In this Blog, I am going to perform some of operations on Active Directory and their users/computers, that aligns with a typically IT Support role. This Operations are:
- User & Group Management.
- Folder and Drive Access Management Operations.
- Computer Management.
- Security & Compliance.
- Automation & Scripting.
- Backup & Disaster Recovery Operations.
Each Operations contains subsets which would allow use to perform more granular activities in an ADDS environment. Firstly we will perform Operations related to User & Group Management.
In this module we gonna perform 4 major functions that an admin performs over a user & groups, this includes user profile creation, group creation ( security & distributed), Creating GPO and linking it with an OU and many more.
Let’s start with our first module i.e Creating and managing User Accounts:
- Add a new user to AD.
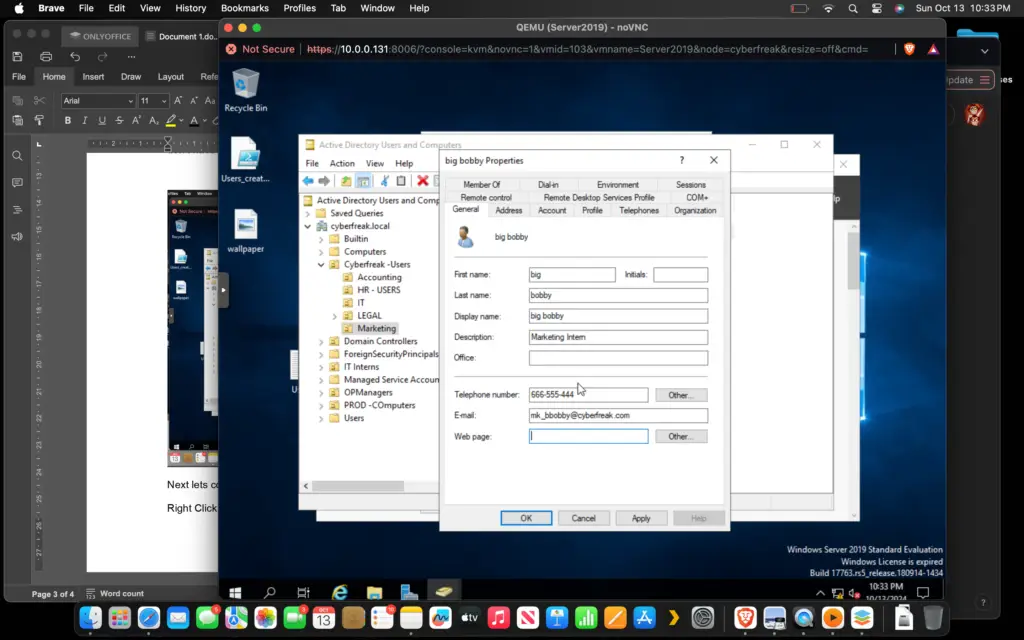
- Configure user properties (e.g email, phone number , department etc)
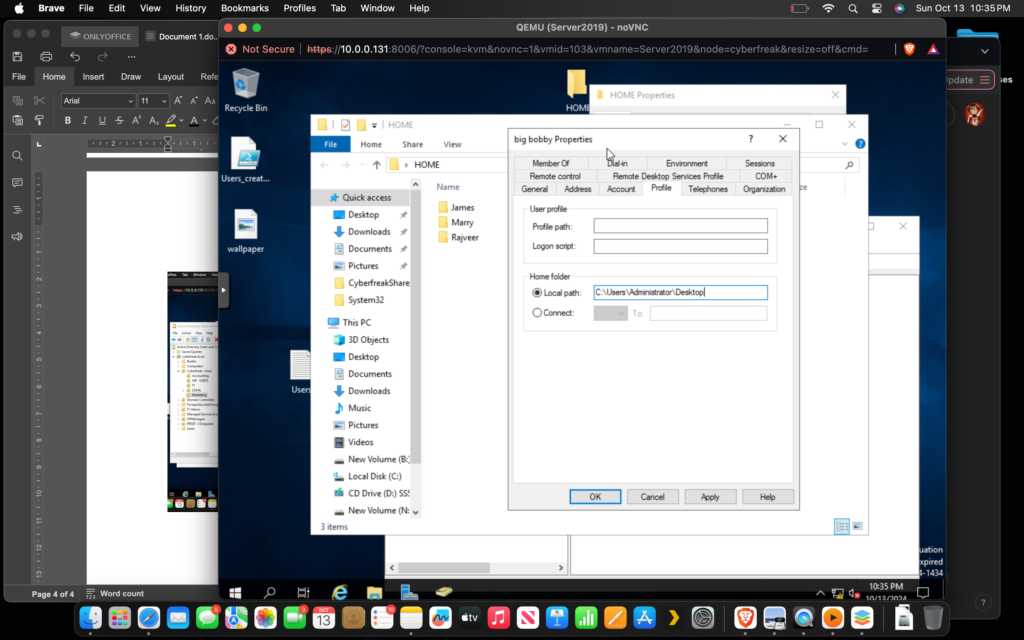
- Setup user profiles and home directories.
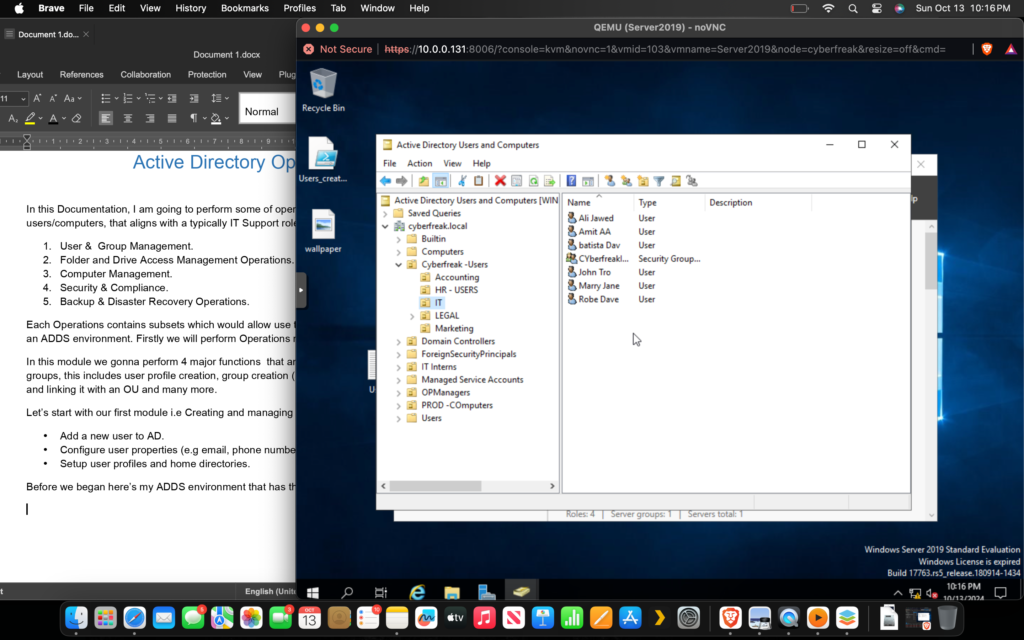
Before we began here’s my ADDS environment that has the following structure with 5 Organizational Unit each representing a different department, and has users respectively, I only have one Computer added at this time to keep the environment clean and reduce complexity on later stages.
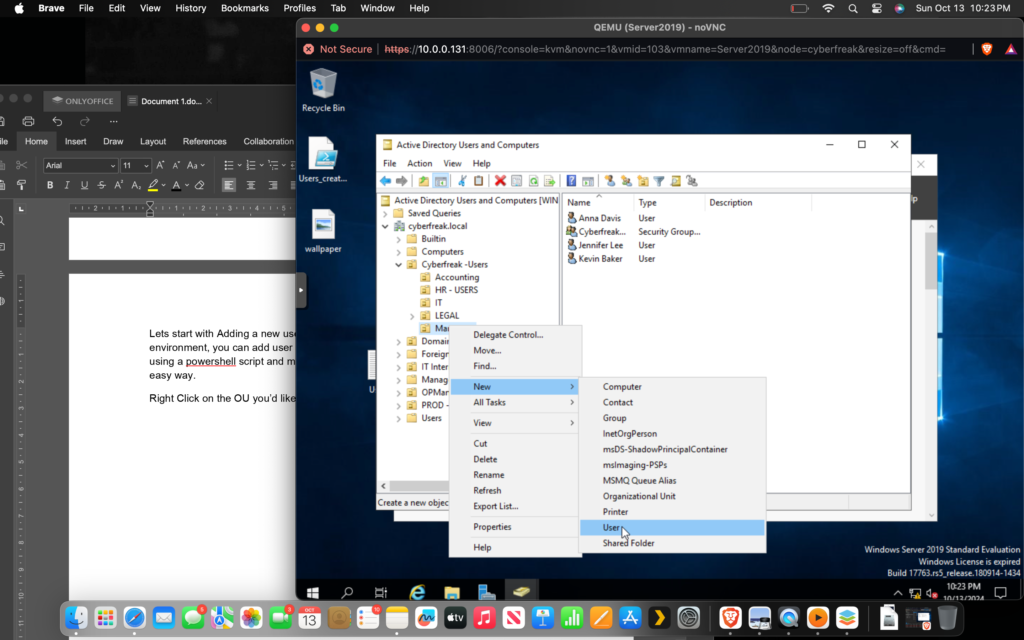
Lets start with Adding a new user in an AD, User creation is pretty straight forward in AD environment, you can add user one by one on each OU or you can add bulk users in an OU using a powershell script and move on to the next, we gonna cover both, first lets start with the easy way.
Right Click on the OU you’d like to add user in -> New -> User —> Add the Details of the user—-> Set password —> Check on Password never expires & user cannot change the password—> Finish
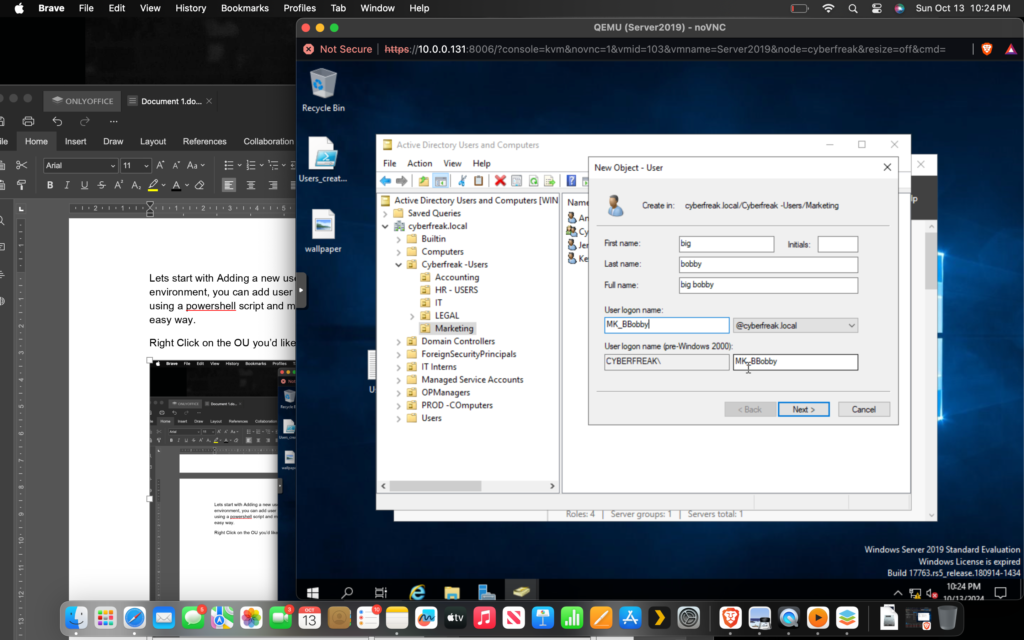
Note : It is a good practice to keep the username starting with he department followed by Firstname initial and the Last name. This will help you to identify the user quickly so that you don’t have to go through the directory structure.
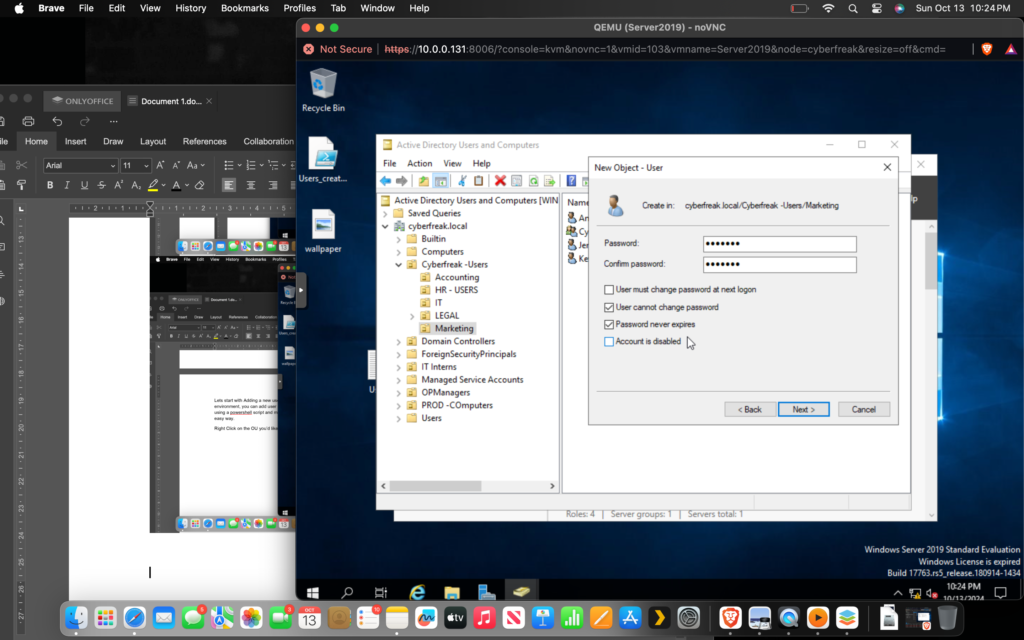
Next lets configure, User profile add some more details and Setup its Home Directory.
Right Click on the user created —> Properties —> General—> ADD_INFO —-> Profiles —> Local Path —> Apply.
For Local Path you can create a directory on your server and add its path under Local Path, Click Apply.
GPO Management
In this section we will create some group policies and link it with our OU, policies that we will create are Password Policies, Account lockout Policies, ScreenLock Policies across computers, we will create more polices as we move further modules.
All GPO can be found under Server Manager —> Tools (TOP RIGHT) —> Group Policy Management.
You will be presented with the screen like below, Now its worth to mention that you’ll already find a Default Domain Policy that is already applied across all the OU and Groups, and it is a best practice to keep that policy as is and not add you created policies into that, We should always create a new policy and Link that with an OU, it helps you to keep you policy restricted to the OU you apply and doesn’t applies on environment, ensuring granular control and segmentation.
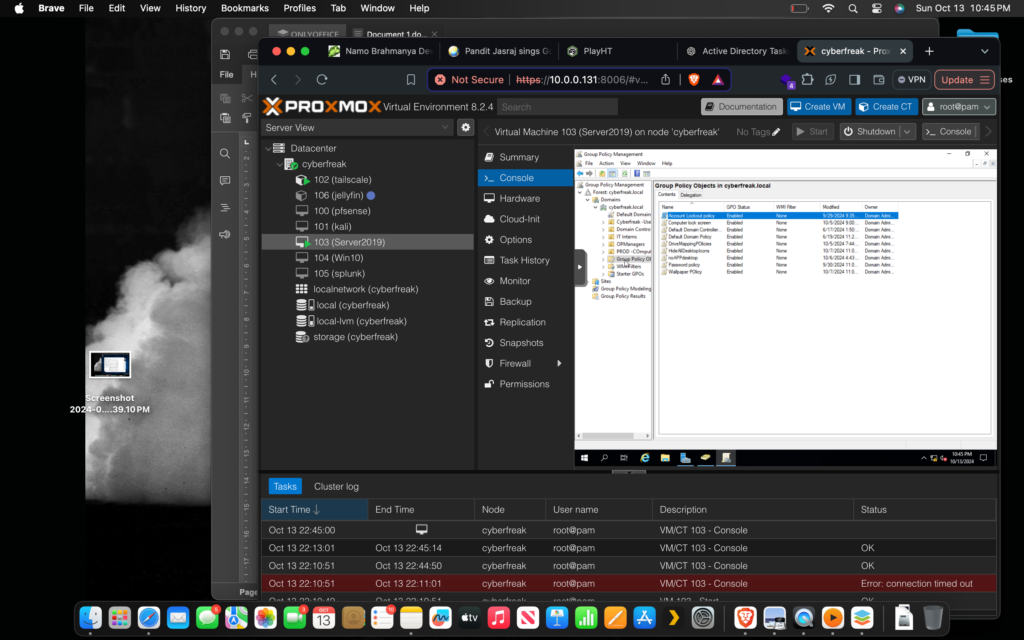
TO create a Password policy Click on Group Policy Object as shown in above picture—> Right Click on it —> NEW Policy —> NAME_THE _POLICY —> OK.
After that Right Click on newly created Policy —> Edit—> You will be presented with the screen like below.
You’ll see 2 Categories, Computer Configuration & User Configuration.
Computer Configuration: These are the set of policies that are applied when you want to apply it on the computer, so whoever logs in to the computer this policy will be in effect for that user.
User Configuration: These are the set of policies that are applied when you want the policy to travel along with the user.
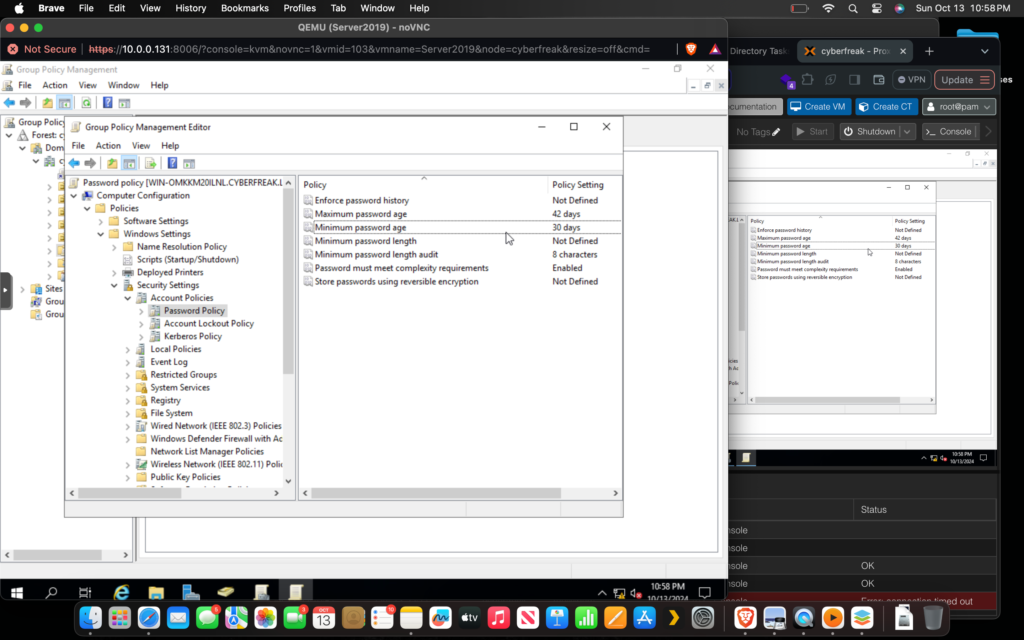
Password policy can be found under Computer Configurations —> Policies —> Windows Settings —> Security Policies —> Account Policies —> Password Policy.
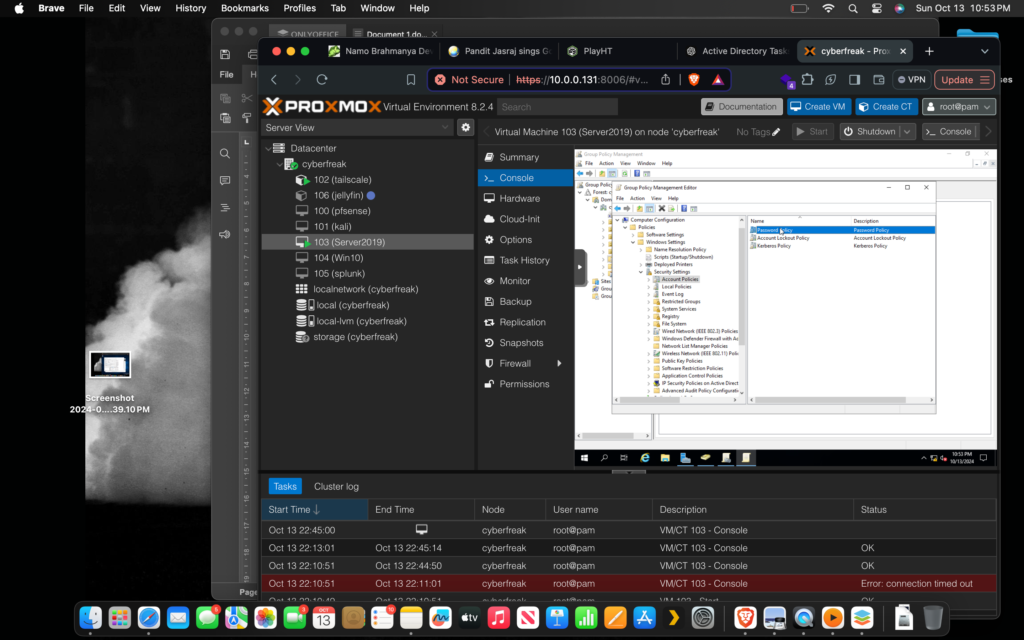
Below are the policy settings I’ve applied.
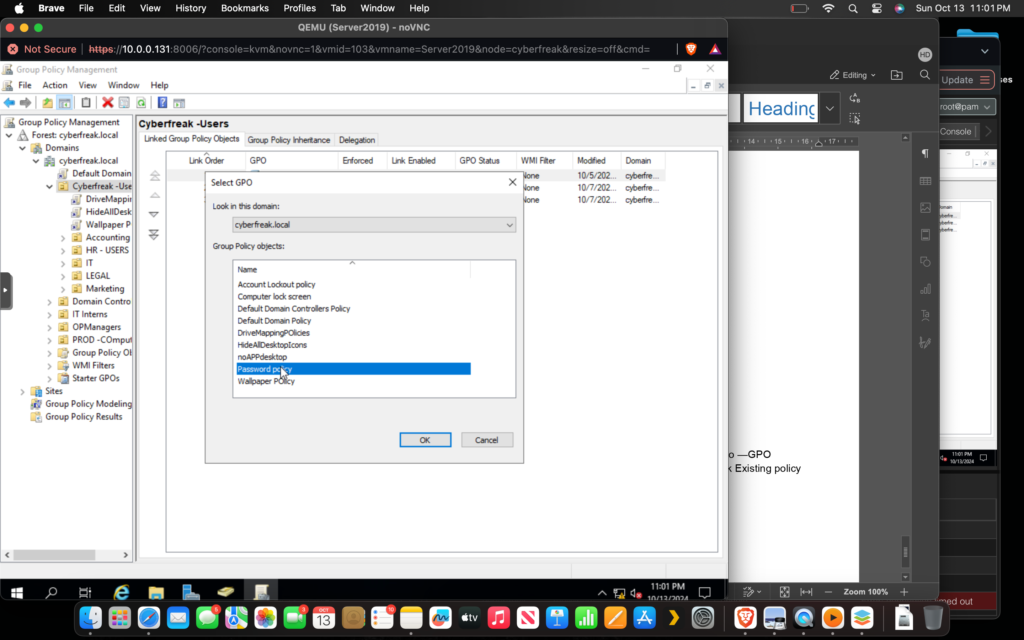
Next let’s link this policy to the OU containing all the user to do that go back to —GPO Management —> Right Click on the OU you want to link this policy to—> Link Existing policy —>Select Password Policy —> OK.
Account Lock out Policy
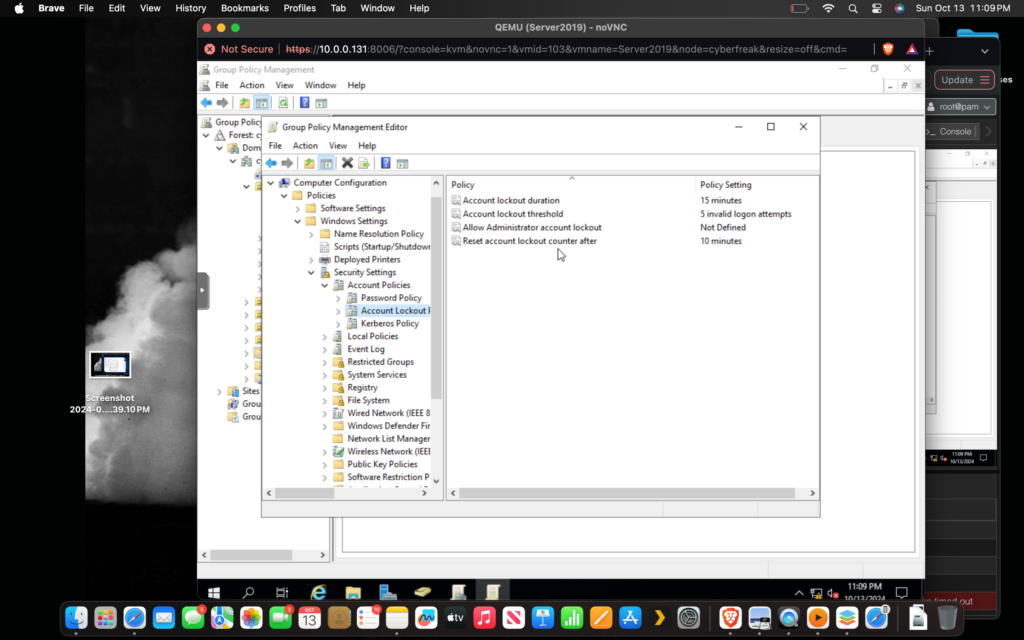
Account Lockout policy can be found under Computer Configurations —> Policies —> Windows Settings —> Security Policies —> Account Policies —> Account Lockout Policy.
- Account Lockout Threshold:
Defines the number of failed sign-in attempts before a user account is locked.
Example: If set to “5,” the account is locked after 5 incorrect password attempts. - Account Lockout Duration:
Specifies the length of time (in minutes) that an account remains locked before being automatically unlocked.
Example: If set to “30,” the account will stay locked for 30 minutes. - Reset Account Lockout Counter After:
Determines the time (in minutes) after which the failed login attempt counter is reset to zero if no failed attempts occur within that period.
Example: If set to “15,” after 15 minutes of no failed attempts, the counter resets.
Below picture can be taken as reference as an Idol settings that can be kept according to Microsoft.
Group Management
There are two types of groups in ADDS environment.
Security Group:
A Security Group in Active Directory is used to manage user permissions and access control to resources such as files, folders, printers, and other objects. Members of a security group can be assigned permissions to resources directly, enabling centralized management of access rights.
Distribution Group:
A Distribution Group is used for email distribution lists, primarily within Microsoft Exchange environments. It is not security-enabled, meaning it cannot be used for assigning permissions to resources. Its purpose is to facilitate communication by grouping users for email broadcasting.
Difference:
- Security Group: Used for both permissions management and email distribution.
- Distribution Group: Used only for email distribution, without permissions management.
To create group select all the members you want in a group —> Right Click —> New —> Group —> NAME_GROUP—> Select type of Group —> OK.
At last below is the Powershell script to add bullk users, we will discuss the details of scripting in Automation & Scripting module.

